What does a Garden Gnome do when she is not gardening, in the kitchen or doing genealogy? Well the answer might just surprise you so read the entries to find out more. This blog focuses on everything we do to make our house a home. There will be a strong emphasis on home energy efficiency and do-it-yourself (DIY) projects. At the same time there will also be crafts, knitting and crocheting projects along with any other little tips we do to create that down to earth, I want to be here home. Please enjoy your visit :)


Wednesday, June 27, 2012

Lock Those Windows to Reduce Air Infiltration

Our first home was a duplex with fairly decent windows then we bought our turn of the century home.  It had old wood windows with no locks on them and storm windows to make them a bit more energy efficient.  By storm windows, I mean storm windows.  We took the glass storms off when the nicer weather hit, replacing them with screens and visa versa when the cooler weather hit.  Now this was the way it was when I was growing up so I thought that was the norm.  We lived there for eleven years, tolerating all of the drafts.  When we bought our next house, a back-split in a nice subdivision, I discovered windows don't need to be drafty.  Fast forward to this house, built in 1994.  The windows have built-in locks.

Window locks are more than providing security.  I have a lot of problems with my ears so aside of the intense itching, certain noises seriously hurt my ears and they don't have to be loud either.  Think, the low hum of the refrigerator or that low whistling of air coming in a window just cracked open.  Shortly after moving in, we had the AC on and all the windows shut.  I could hear a whistling that almost drove me nuts trying to find where it was coming from.  Eventually I tracked it down to our bedroom where we had shut but not locked the window.  What was happening is the AC was causing a small amount of air to be sucked in that window.  I locked the window and the noise went away.  Most would not ever have noticed the slight whistle but because my ears are so sensitive, I noticed it. 

Locking your windows when using your HVAC system saves you money.  The lock pulls the window tighter, creating a more effective seal preventing air leakage or air infiltration.  If your windows do not have locks and they should for security purposes, it is quite an easy and inexpensive DIY project.  So do take advantage of window locks to help save a bit of energy and money using your HVAC system.

Garden Gnome
©2006-2012


Monday, June 25, 2012

Our Executive Home

We moved into our new to us home in September of 2011.  It is in an 'estate' subdivision.  The house was billed as being an executive home when it was built in 1994 and each time it has been on the market it was billed as such.  The house itself is gorgeous with some nice features (eg. marble/ceramic flooring, laminate flooring, ceramic tile countertop, interlay brick driveway and sidewalks) but in our opinion is lacking a lot of features that we would consider being standard in an executive home.  The rooms are large and spacious, the exterior is lovely but the gardens and interior need updating.  The front garden beds in particular are a real cliche, seriously being ripped completely out and starting from scratch.  Both decks basically need to be rebuilt and the fence needs to be replaced but the pool deck is simply horrid.  All of the lighting fixtures need updating and of course the interior needs painting to suit our tastes.  We have a lot of plans for this house.  Essentially, what we need to do is a lot of upgrades and improvements to bring our house up to what is expected in an executive home.  Here's a few of them with those already completed marked accordingly:

  • garburator - Unless prohibited by the local bylaws, a garburator (kitchen disposal) is an expectation with most moderate to high end houses.  This house does not have one or if it ever did, it was removed.  We have bought a garburator but have not installed it yet.   It should be installed within the next week or so depending on time restraints.
  • central vacuum - This really is an expectation in any moderate to high priced house in our area.  They are inexpensive (under $1,000) and very easy to install during a new home build.   We installed a Hoover central vac about two months ago.  
  • pool/decking - If a pool is installed in higher priced houses in our area, it is usually an in ground model.   The previous owners installed an above ground pool here rather than an in ground.  There are two reasons for this with the first being the cost and the second being a possible buried obstacle.  Line locates did not indicate any buried utility lines.  We are replacing both decks to form one large deck giving a nice finished edge around the pool and covering almost the entire back yard in decking.
  • fencing - The existing fencing may have met the code when the pool was installed but it certainly does not meet the current code for pool fencing.  It provides little in the way of privacy and is in need of repair.  We are replacing the fencing incorporating it into the decking to give privacy while meeting the current code.
  • landscaping - Landscaping really creates the curb appeal of a house so even low priced houses are expected to be neatly landscaped.  Higher priced homes in our area are often professionally landscaped.  On first glance our property has lovely gardens but they are really over grown, weed filled and poorly planned.  The front garden beds were edged with the brick raised walls but poorly done.  I really don't like the look of the raised walls so have already removed it from the small garden between the sidewalk and garage on the west side.  That bed has been revamped with a trellis, clematis and red cedar chips.  I am working at cleaning out the larger front bed that will also have red cedar chips and all new plantings.  The front bed will wrap around the west side of the house.  The small garden bed between the garage and sidewalk on the east side will also have the red cedar chips and two trellises with clematis.  I'm using the less is more philosophy for the plantings in the gardens, a naturalization method for crocuses in the front yard, and container plants combined with climbing flowering vines to soften the fences of the new decking.
  • front porch - Our front porch is a cement slab about 4' x 10' raised about 1' with a small, half-circle step to the sidewalk.  It is plain and non-descript. We are resurfacing it with a concrete decorative finish. 
  • interior - Most of the interior upgrades needed are decorative as in fresh, updated paint colours.  We are replacing the sinks and countertops in the bathrooms as well as adding custom built wood trim and built-ins.
Garden Gnome
©2006-2012


Sunday, June 24, 2012

Ten Home Improvements That Reduce Air Conditioning Costs

There is no doubt about it, the cost of electricity is continuing to climb.  We now have TOU pricing with the highest rate falling between 11 AM and 5 PM from May 1 to October 31.  Unfortunately, this covers the hottest time of the day (12 PM to 4 PM) precisely when air conditioning is needed the most.  There are several low to moderate cost home improvements that can help reduce your air conditioning costs.  Here are a few of them:

  1. If your HVAC is older than 20 years the recommendation is to replace it with new, energy efficient models that use less electricity.  There are grants available in Ontario to help offset the cost of replacement if doing both at the same time. (about $7,000 to $15,000)
  2. If your furnace is working fine and under 20 years old, you can replace the AC unit only. (about $2,000 to $3,000, professionally installed)
  3. If your HVAC is newer than 20 years old but has the older style blower motor, it is possible to replace the motor with a new, energy efficient one that uses less electricity. (about $100 to $350, DIY)  Savings on this replace will be about $500 per year.
  4. Plant shade trees strategically to help shade the house.  (about $50 to $1,000 depending on size of tree).  Larger trees will need a backhoe to plant them (about $200 for one man, 2 hours labour)
  5. Plant non-invasive flowering vines (eg. clematis, climbing roses) on trellises on the east and west walls of your home.  (about $50 per trellis, $15 per plant) This will help shade the walls keeping the interior of your house cooler.  Do not plant invasive or damaging vines like English ivy or Trumpet vine on your house as both attract mosquitoes and spiders.  Both damage exterior surfaces of your house and English ivy in particular attracts rodents.
  6. Install solar window film to lessen solar gain in the summer and thermal loss during the winter.  (about $300, DIY to $1,000, installed depending on number of windows and sizes).
  7. Seal your house to prevent cooled air from leaking out or hot air from entering into your home.  (about $2 per tube of caulk, DIY)  Weather strip doors and windows to prevent air leakage. (about $10 to $30 per door, $5 per window)
  8. Replacement windows can greatly reduce both your heating and cooling costs.  If you can't retrofit your windows with weather stripping, caulk or second pane of window, consider replacing them with energy efficient, double or triple pane windows.  Whole house window replacement (about $3,000 to $5,000) can be a DIY project or you have have them professionally installed usually in one day.  
  9. Install awnings on your windows and doors.  This is an age old method of shading windows and doors.  They can be wood, aluminum or fabric and some are retractable.  You can install them on all your windows if you want a uniform look although awnings installed on north facing windows will make those rooms considerably darker, or install just on problem windows and doors like an south, east or west facing patio door.  Not only does an awning installed on a patio door shade the room indoors, it creates a shaded outdoor sitting area as well.  (about $200 per window depending on size)
  10. Install a seasonal gazebo off your patio doors.  This will shade the patio giving you a nice outdoor dining or sitting area while also shading the interior of the room.  (about $400, DIY)
Garden Gnome
©2006-2012


Friday, June 22, 2012

Ten Ways to Save on Air Conditioning

Our previous home was rural, on waterfront property with fairly dense shade cover and good cooling breezes so we only turned the air conditioning on when the humidity levels were high.  This house in in an urban subdivision backing onto a small field.  There is virtually no shade that affects the house other than when the sun hits noon and later the deck on the east side of the house gradually gets shadier.  The attached garage likely helps on the entrance level as it shades from the morning sun as while it is warm it is not a hot as the sun would be.  We have had a couple of weeks of rather hot weather with temperatures reaching a high of 32ºC/90ºF range but with the humidex feeling like 38ºC/100ºF and UV index 8 (very high) and smog alerts.  That means the air conditioning is really working over time.  Here are ten things we are doing to save on our air conditioning costs:

  1. We close the window treatment on any window receiving sun until the sun is completely off the window.
  2. The temptation is to keep the main entrance door open and screen door close but that lets in a lot of heat so we have been keeping the main entrance door closed.
  3. We closed the HVAC registers on the lower level that is partially below grade and always cooler.
  4. We have all lights turned off during the day with the exception of the bathroom as there is no natural light source but only when absolutely needed.
  5. Cooking has been kept to on the outdoor grill, very minimally indoors (eg. toaster) but only if absolutely needed.
  6. We have been making low or no cook meals (eg. BLTs, meal style no cook sandwiches, meal sized no cook salads)  on the extremely hot days.
  7. Any home canning that has to be done (and that's inevitable) has been done on the odd cooler day, earlier in the morning when I could open the patio doors and the hot water from the BWB canner dumped immediately after processing was complete.
  8. We have refrained from using heat producing appliances like the blow dryer, curling iron, clothes iron, dryer, oven and anything else that produces heat on the extremely hot days as well a very minimally during the recent heat wave.
  9. We keep our thermostat set to 24ºC/75ºF which is quite comfortable without the humidity in the house.
  10. We minimize opening any exterior door during the heat of the day (12 PM to 4:00 PM).

Garden Gnome
©2006-2012


Wednesday, June 13, 2012

Oh the Joys of Renting Out Our Vacation Home

We along with another couple arrived at our vacation home in Florida on May 8.  I seriously was embarrassed!  The resort takes care of any rental arrangements for us but believe me that is going to change.  It has been nothing but problems this year what with late rent payments and bogus repair charges.  Then we arrive to find a house that was dirty even though the cleaners had been in three times.  Apparently the cleaners don't do sinks, toilets, the wall behind the stove, or floors.  I was beyond ticked!  I should have called them right then but it was well after 10 PM so the next day I got busy cleaning then we flew out to Aruba.  When we returned from Aruba and our friends left, I had a good chance to assess our home.

Two bath towels had somehow become violet, not white, violet.  Two hand towels looked like they had been used to clean up axial grease.  Every cabinet had been rearranged and someone had plastered stickers all over our patio doors.  The microwave oven was beyond being disgusted, it was down right filthy.  The drip pans on the stove were equally dirty.  The hard flooring was quite dirty and clearly the mirrors had not been cleaned at all.  I actually had to clean toothpaste splatters off one of the mirrors.

I spoke with the resort.  They were very apologetic and reassured me it will not happen again.  They are replacing our towels.  Clearly, we cannot leave out good towels or anything else we don't want ruined.  That includes some small kitchen appliances.  We have a locked storage closet but need to add personal storage in the shed.  The thing is we have rented plenty of condos, time shares, and cottages where there is a fully equipped kitchen.  I wouldn't dream of rearranging the kitchen or leaving the place dirty or destroying what was left there to make life easier during the rental period.  Apparently others do not feel the same way!


Garden Gnome
©2006-2012


Tuesday, June 12, 2012

Levolor® PanelTrac™ Patio Door Treatment in the Kitchen

Patio doors are always a bit more difficult to choose some type of covering.  It is a big expanse of glass that can cause considerable thermal loss at night especially during the winter months and yet during the summer months the solar gain can be enough to make the room unbearably hot.  In both cases, patio doors can end up increasing your heating and cooling costs.  We had two sets of patio doors in our last house but chose not to cover them so we could enjoy the gorgeous view.  Privacy wasn't an issue and the property was very shaded in the summer so leaving them bare wasn't a problem.  We have patio doors at our vacation home with the standard vertical blinds.  This house has patio doors in the kitchen with the summer sun being problematic in the morning and one of our neighbour's windows looking directly into.  So far privacy has not been an issue.  I wanted something to lessen the solar gain during the summer while providing a bit of privacy when desired.  At the same time I didn't want the standard vertical blinds.

Levolor woven weaves totem pole panel
I decided to order custom treatments for the patio doors and the large living/dining room window.  Unfortunately, the living/dining room window treatment turned out to be a nightmare AND they brought out the wrong fabric panels for the patio doors.  Although the living/dining room window treatment remains unsettled, we finally got the patio doors finished in the panels we had ordered.  This is precisely why on any custom window treatment being installed by the company, you should never pay more than a deposit until they are installed and you are satisfied with the install. 

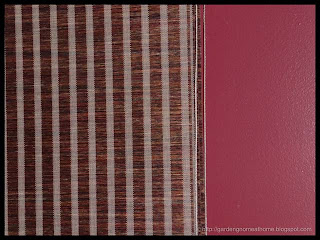
We chose Levolor® PanelTrac™custom made for our patio doors in woven weaves 23501 Totem Pole.  The colours match nicely with the kitchen and if you look close the colours of the rest of the house (taupe, moss green, navy blue) are in the weave as well.   Ours is a four panel, one way draw, light filtering covering.  Each panel attaches to the carrier on the head rail via Velcro strips making them easy to change and clean.  When opened with the auto wand, each panel stacks one behind the other.  Unlike the standard vertical blinds, these panels do not turn so cannot be adjust in that manner.  They simply slide back and forth.

view when PanelTrac is closed during the day
Levolor® offered a wide range of panels to choose from.  The solar panels don't completely block out the view but rather block the solar gain during the day and the heat loss at night.  The opacity is noted for each fabric so you can get panels offering no opacity to those with 95% opacity.  The higher the opacity the less you can see out or others see in. 

During the day, we can still see out somewhat but our neighbours can't see in.  This is perfect in the mornings when we are still in pajamas and sporting bed head.  They are working quite nicely to control the solar gain during the mornings.  By lunchtime, I can open them fully to take advantage of the natural light without the solar gain.

view when PanelTrac is closed at night
At night, the light filtering works in reverse so if there is a light on in the kitchen, the neighbours could see in.  However, we chose a heavy enough weave (95% opacity) they would likely only be able to see shadows, nothing clearly.  Without lights on, you can't see through them, perfect in the event of an attempted break-in and when we are on vacation.  We are used to this as the panels work very much like the SolarGuard window film we installed in one of our houses where solar gain was a huge problem during the summer months.

I really like the way the PanelTrac™ looks.  We may put a custom wood valance on it but haven't decided yet.  All around though, dealing with this particular local business has left a rather nasty taste in our mouths.  We won't deal with them again!  It took them almost three weeks to get the PanelTrac™ to what we ordered and the living/dining room (Eclipse shutters) still has the old sheers after they installed incorrectly without the necessary parts.  The shutters could not be opened and when I tried, one fell off and hit me.  I finally told them to take the shutters down and take them back.  They 'said' they would make it right but we've heard nothing from them since being home from vacation.  In case you are wondering, the PanelTrac™ cost us $680.26 plus $25 for installation.  There is a lifetime warranty against manufacturing defects and a 5 year on the panels themselves.

Garden Gnome
©2006-2012